karizma classic album without Dongle/DONGLE BREAK SOFTWARE Full version Free Download.

Karizma Classic software
Introducing The KARIZMA Album Designer Software, a Fast and user-friendly Digital Album Creation Tool, which helps you to create designer albums for your premium customers who demand the world… & this is the time you give them the best of it.
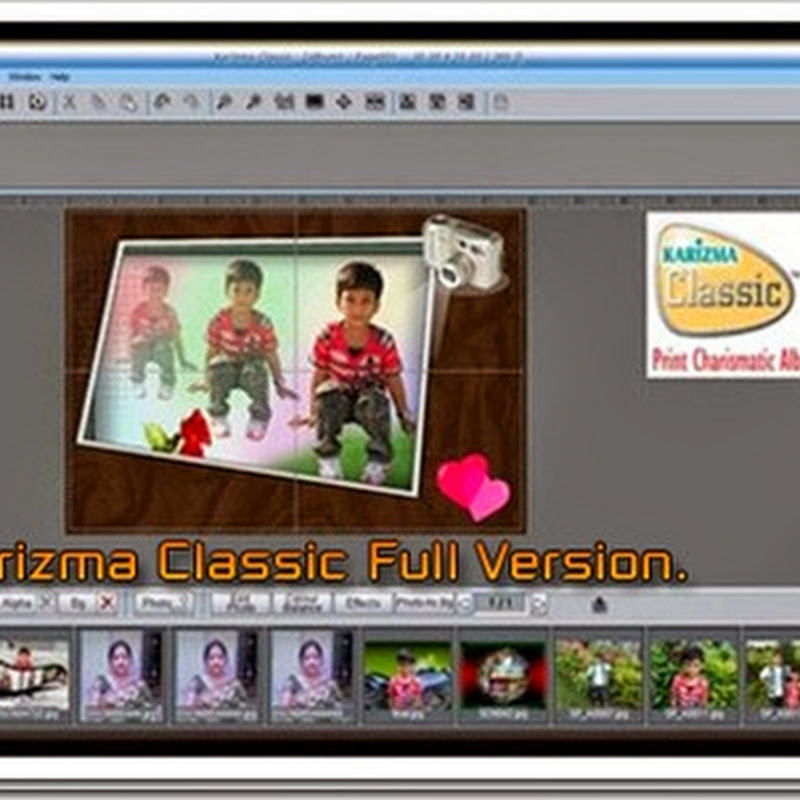
KARIZMA Album Designer is a complete and stand-alone software, neither requiring third party tools nor any artistic skills for creating impressive album pages within minutes. Are you interested in capturing the beauty of a wedding, fun of a family vacation, Birthday Party, or any other occasion and to preserve these precious memories in a digital way, KARIZMA Designer gives you incomparable tools... all guaranteed to help you produce exclusive and stylish photo albums which will be cherished for a lifetime. KARIZMA Designer helps you increase productivity and make big profits because of its ease of operation and the numerous templates, decors and Various tools it is bundled with.
Features:-
    Customizable Template page size & DPI Setting
    Resizing pages in album to desired size
    Storyboard
    Dual page mode to work with multiple pages.
    Big Gallery Mode for viewing more Templates & Photos
    Tools for Photo Editing & Enhancement
    Resize, Crop, Rotate Photo, Replicate Object Properties
    Unique Slide Show for proofing
    Universal graphics format support
Karizma Classic v1.0 Support Export Bmp,Jpg,Gif,Tif,Tga,Png
===========================================================
Note: WinXP with latest service pack required.
Please Read Carefully Install Note:- =======
Run Setup.exe and follow this steps...
Next            ; Welcome
"I accept..."
Next            ; End User License Agreement
Enter User Name
Next            ; User Information
Next            ; Destination Folder
When asked, Insert Disc 2
OK
Next            ; Setup completed Successfully
OK            ; Dongle Message
Finish
Crack
=====
- Run kclassic1.exe
  Enter Password >> Click Here For Password
  OK
  Install
- Run App by double-clicking "Karizma Classic" icon on Desktop Enter
  Registration Code >> Click Here For Registration Code
How to Download Karizma Classic :-
Click Download  Below Link A new tab Open Then
multisoftare4u

Download Karizma Classic album Link Below-
Download CD SETUP 1 And CD SETUP 2 From rapidshare.com Link Below:-
Download link tested by me on 4th JULY 2013 link OK

AND


OR.............................
Alternative Link From Google Docs

AND

Crack Password-
  Enter Password >> Click Here For Password 
OR Alternative Link-
Enter Password >> Click Here For Password 

Registration code-
Registration Code >> Click Here For Registration Code
OR Alternative Link-
Registration Code >> Click Here For Registration Code

Copy All download file in one folder and extract with winrar. You get nrg. file.
Burn 2 CD by Nero Or Other Burning software.
Or
Direct Install By Nero>Toolkit>ImageDrive

thanks to ittaleem.

MS Excel currency converter - Number to words Latest version

MS Excel currency converter - Number to words Latest version

MS Excel currency converter 3.0 has been update with bug fixes.

Bugs fixed in version 3.0  - for 1000 and 100000 it was resulting in null string. Now it has been fixed.

Download here the Module.

Download

Download here the Complete Excel.

Downlaod

How to Convert Number into Word in Excel in Indian Rupees

Convert number into word in excel in Indian Rupees,, this code will work in all version of Microsoft Excel like (2003, 2007, 2010, 2013). Just fallow these easy steps. 

1)         Copy this code
Function SpellNumber(amt As Variant) As Variant
Dim FIGURE As Variant
Dim LENFIG As Integer
Dim i As Integer
Dim WORDs(19) As String
Dim tens(9) As String
WORDs(1) = "One"
WORDs(2) = "Two"
WORDs(3) = "Three"
WORDs(4) = "Four"
WORDs(5) = "Five"
WORDs(6) = "Six"
WORDs(7) = "Seven"
WORDs(8) = "Eight"
WORDs(9) = "Nine"
WORDs(10) = "Ten"
WORDs(11) = "Eleven"
WORDs(12) = "Twelve"
WORDs(13) = "Thirteen"
WORDs(14) = "Fourteen"
WORDs(15) = "Fifteen"
WORDs(16) = "Sixteen"
WORDs(17) = "Seventeen"
WORDs(18) = "Eighteen"
WORDs(19) = "Nineteen"
tens(2) = "Twenty"
tens(3) = "Thirty"
tens(4) = "Fourty"
tens(5) = "Fifty"
tens(6) = "Sixty"
tens(7) = "Seventy"
tens(8) = "Eighty"
tens(9) = "Ninety"
FIGURE = amt
FIGURE = Format(FIGURE, "FIXED")
FIGLEN = Len(FIGURE)
If FIGLEN < 12 Then
FIGURE = Space(12 - FIGLEN) & FIGURE
End If
If Val(Left(FIGURE, 9)) > 1 Then
SpellNumber = "Rupees "
ElseIf Val(Left(FIGURE, 9)) = 1 Then
SpellNumber = "Rupee "
End If
For i = 1 To 3
If Val(Left(FIGURE, 2)) < 20 And Val(Left(FIGURE, 2)) > 0 Then
SpellNumber = SpellNumber & WORDs(Val(Left(FIGURE, 2)))
ElseIf Val(Left(FIGURE, 2)) > 19 Then
SpellNumber = SpellNumber & tens(Val(Left(FIGURE, 1)))
SpellNumber = SpellNumber & WORDs(Val(Right(Left(FIGURE, 2), 1)))
End If
If i = 1 And Val(Left(FIGURE, 2)) > 0 Then
SpellNumber = SpellNumber & " Crore "
ElseIf i = 2 And Val(Left(FIGURE, 2)) > 0 Then
SpellNumber = SpellNumber & " Lakh "
ElseIf i = 3 And Val(Left(FIGURE, 2)) > 0 Then
SpellNumber = SpellNumber & " Thousand "
End If
FIGURE = Mid(FIGURE, 3)
Next i
If Val(Left(FIGURE, 1)) > 0 Then
SpellNumber = SpellNumber & WORDs(Val(Left(FIGURE, 1))) + " Hundred "
End If
FIGURE = Mid(FIGURE, 2)
If Val(Left(FIGURE, 2)) < 20 And Val(Left(FIGURE, 2)) > 0 Then
SpellNumber = SpellNumber & WORDs(Val(Left(FIGURE, 2)))
ElseIf Val(Left(FIGURE, 2)) > 19 Then
SpellNumber = SpellNumber & tens(Val(Left(FIGURE, 1)))
SpellNumber = SpellNumber & WORDs(Val(Right(Left(FIGURE, 2), 1)))
End If
FIGURE = Mid(FIGURE, 4)
If Val(FIGURE) > 0 Then
SpellNumber = SpellNumber & " Paise "
If Val(Left(FIGURE, 2)) < 20 And Val(Left(FIGURE, 2)) > 0 Then
SpellNumber = SpellNumber & WORDs(Val(Left(FIGURE, 2)))
ElseIf Val(Left(FIGURE, 2)) > 19 Then
SpellNumber = SpellNumber & tens(Val(Left(FIGURE, 1)))
SpellNumber = SpellNumber & WORDs(Val(Right(Left(FIGURE, 2), 1)))
End If
End If
FIGURE = amt
FIGURE = Format(FIGURE, "FIXED")
If Val(FIGURE) > 0 Then
SpellNumber = SpellNumber & " Only "
End If
End Function
2)         Open excel sheet and press “Alt+F11”
3)         A new windows will appear click on “Inert” and then “Module”
4)        Paste the code in box
5)         Click on “File” and then “Close and return to Microsoft Excel”

6)        Keep the course in box where you want to convert number to word and type “=spellnumber(row & column)” (Eg. E7) and press “Enter”

Run graphics program in Turbo C

Hello friends,

In the last post(which was actually my first post),i told you the 2 ways to run Turbo C in full screen in Windows7.In this post,i will tell you how to run graphics program in Windows XP or even vista/7.There is no big problem in that,but when we download Turbo C and install it,then its default graphics library is not set and some of the files are missing in it.If you will try to compile any program in it,then it will show linker errors.For removing these,you will have to go to Options>Linker>Libraries.Here,you will find that there is only one option(Standard Run Time),which is cross marked.Now just cross marked Graphics Library.Then press OK.

The files that are missing are egavga.bgi and egavga.obj.Without these,your graphics program will be compiled with no errors,but when you will open the user screen by pressing Alt plus F5.

Now, download the egavga.bgi file and the egavga.obj file.

After,downloading,copy these files to bgi folder of Turbo C.

Now ,Run Turbo C.

Even if it is not working,then copy all the files from bgi folder to bin folder.

Always remember that you need to run Turbo C in full screen to run graphics program.
If you want that i should make you understand by making a video,then please post that as a comment and please Subscribe for more...Thanks.
 I have made 1 graphics program,maybe you find interesting:

#include
#include
#include
#include
#include
int main(void)
{
int gdriver = DETECT, gmode, errorcode; int i,j;
initgraph(&gdriver, &gmode,"");
for(j=1;j<2 b="" j="">
{
for(i=1;i<=30;i++)
{
circle(300,200,i); setcolor(i); delay(100);  
}
circle(300,200,30);
setcolor(0);
for(i=30;i>=1;i--)
{  
circle(300,200,i);  
setcolor(0);  
delay(100);
}
}
getch();
closegraph();
return 0;
}

Run Turbo C in full screen in Windows7


Hello friends,
Today everybody has upgraded to Windows7,but engineering students face problems of full screen in Turbo C in Windows7.
I have a solution to this problem.

1st Solution:

1.Download and install the usual Turbo C program
.
2.Then you have to download Emulated Turbo C++ and the password is mohitsaxena.

3.Just install it as usual and run it.

2nd Solution:

1.Install the Turbo C as usual and then download Dosbox for Windows here.

2.Run Dosbox which is just similar to dos of windows,but it has slightly different commands from Windows Dos.

3.Here you will find that default drive is Z:\.As we all install turbo C in C:\ mostly.So,for changing the drive ,type mount c c:\ and then press Enter.But it will still show you some error,then again type C:\ and press Enter .

4.Now the drive will be changed and normal windows dos commands will work.So,type cd TC.Then, cd bin and finally TC.exe.Now Turbo C will start through Dosbox.

5.The main use of Dosbox is that it has full screen mode.For full screen mode press Alt plus Enter. And your full screen Turbo C will start running.

There are other ways too like disabling the graphics but in some computers ,they dont work.

I will advice you to go any one of the above,but i will say you must have found the first one easy.So go for it.
In the next post,i will write about How to run graphics program in Turbo C in Windows.Also,do write your views and post your problems in C/C++ program.

HOW TO DOWNLOAD HOTSTAR VIDEOS IN PC AND ANDROID


Step 1: download hack application here:

Step 2: Go to hotstar web site link: www.hotstar.com

Step 3: copy url which video you like to download

Step 4: open which i give rar file in that "hotstarlivestream" (windows patch file). and it open                    cmd window paste the url in that window.


Step 5: it ask which one resolution you want to download select any you want.

Step 6: then press d for download video. just wait for a mins to download video

Step 7: now just open video folder and enjoy with your video...... 

Download Options

https://www.dropbox.com/s/7rj49tezm0c6jvd/hotstar%20Downloader%20v%201.0%20by%20TechnOrange.com.exe?dl=0


https://www.dropbox.com/sm/share_link/hotstarvijaytvhackstreamer.rar 

VIST OUR FACEBOOK PAGE AND LIKE IT: https://www.facebook.com/supereccomputers
WATCH VIDEO HOW TO DOWNLOAD HOTSTAR VIDEOSAND LIKE IT AND SHARE IT

Easily download videos from Hotstar.com on Windows 7/8/10 using Hotstar Downloader

                  Hotstar is one of the most premium online Entertainment destinations in India as it hosts lots of online content from various TV channels such as Star Plus, Asia Net, Life OK, Channel V etc and also some unique content of its own. So sometimes we may miss an episode or two or we may simply want to collect all epsiodes of our favorite tv serial so that we can watch it anytime and anywhere , So here’s the most easy method to Download Hotstar videos ,TV shows etc right on your Windows 7/8/10 by using Hotstar Downloader Tutorial / Method to Download hotstar Videos using Hotstar Downloader
  • First of all Download & Install hotstar downloader for Windows from the following links –
    Click here to Download Hotstar downloader for Windows 7/8/10
    Mirror Link # Click here to download Hotstar Video downloader from Mirror
  • Once, you have downloaded and Installed Hotstar Video Downloader , Navigate to Hotstar.com Website on your browser , and click on any TV show / Video you want to stream , it will start playing in your browser – Now here copy the complete URL as shown in the following Image –
    HotStar URL
    After you have copied the URL, return to your desktop and Launch the installed Hotstar downloader app , by double clicking the icon .
  • Now, a pop-up Command window will be shown on your screen, In the command window Paste in the URL of the hotstar Stream as shown below and press the “Enter” key.
  • Now, once you’ve pasted the URL in the Video it will list all the available streams as per the quality available here type in the quality of stream which you want to download (e.g 360p) as shown in the figure below & press “Enter” key.
    Select & Type in Quality from Mentioned Streams
    After you have typed in the quality it will ask you whether to play or to download , here type in “d” and hit enter key.
  • Now, once you have typed in the character “d” your download will begin as shown below –
    HotStar download Started Successfully!
  • The “3s @ 1.8 MB/s” indicate that 3 seconds of the TV show have been downloaded at 1.8 MB/s , That’s it ! Now you can easily download any Hotstar videos and TV shows of your choice at your convenience.
  • The Files are saved in the Folder “c:\hotstardownloader\windows” just make sure you don’t use much off your net bandwidth as the downloader requires some bandwidth to download.
Click here to Download Hotstar downloader for Windows 7/8/10Update !! : HotStar updated their site, we too have updated our HotStar downloader, Please uninstall any previous versions and download & re-install the new updated version for a smooth downloading experience.

Android Phone-ல் SD Card-ஐ RAM ஆக மாற்றி போனின் வேகத்தை அதிகரிப்பது எப்படி?

              இன்று Android ஸ்மார்ட் போன் உபயோகிக்கும் அனைவருமே எதிர்கொள்ளும் பொதுவான பிரச்சினை ஒன்று தான், தங்களுடைய ஸ்மார்ட் போன் மெதுவாக செயற்படுவது. இதற்கு முக்கிய காணரமாக நமது Android போனில் இருக்கும் RAM-ஐ கூறலாம். நமது ஸ்மார்ட் போனில் அதிகளவான செயலிகள் காணப்படும் போது, அதற்கேற்ற RAM அளவு நமது போனில் இல்லையாயின் நமது ஸ்மார்ட் போன் மிகவும் மந்தமாகவே செயற்படும்.
இதனால் இன்றைய பதிவில் நமது ஸ்மார்ட் போனில் காணப்படும் SD Card-ஐ எப்படி RAM ஆக உபயோகித்து நமது ஸ்மார்ட் போனை வேகமாக்கி கொள்வது என்று பார்ப்போம்.


SD Card-ஐ RAM ஆக மாற்ற தேவையானவைகள் 

Class 4 அல்லது அதற்கு மேலால SD Card
Root செய்யப்பட்ட Android ஸ்மார்ட் போன்
விண்டோஸ் கணணி
Mini Tool Partition மென்பொருள்
SD Card ரீடர்

உங்களது ஸ்மார்ட் போன் Swapping Support செய்யக்கூடியதாய் இருக்க வேண்டும். இதை பரிசீலித்து பார்க்க இந்த செயலியை உங்கள் ஸ்மார்ட் போனில் நிறுவி தெரிந்து கொள்ளுங்கள்.


அடுத்து உங்களது விண்டோஸ் கணனியில் நான் மேலே குறிப்பிட்டுள்ள Mini Tool Partition என்ற மென்பொருளை நிறுவி கொள்ளுங்கள்.

அடுத்து உங்களது SD Card-ஐ Card Reader மூலம் உங்களது கணனியுடன் இணைத்து கொள்ளுங்கள்.

உங்களது SD Card-ஐ Format செய்யுங்கள்.
பின்னர், Mini Partition Tool-ஐ திறவுங்கள்.
அங்கே உங்களது SD Card-ஐ காணக்கூடியதாய் இருக்கும்.


இப்போது SD Card-ஐ ரைட் கிளிக் செய்து Create Partition என்பதை தெரிவு செய்யுங்கள்.

அடுத்து RAM-க்கு தேவையான அளவு Memory-யை வழங்குங்கள்.

அடுத்து கீழே நான் குறிப்பிட்டுள்ளவாறு செட்டிங்க்ஸ்-களை தெரிவு செய்யுங்கள்.
Partition > Primary
File System > FAT32

இப்போது Done என்பதை கிளிக் செய்து RAM-க்கு தேவையான மெமரி-ஐ உருவாக்குங்கள்.

அடுத்து மிச்சமாக இருக்கும் மெமரி-யை மீண்டும் Make Partition என்பதை கிளிக் செய்து, அடுத்து கீழே நான் குறிப்பிட்டுள்ளவாறு செட்டிங்க்ஸ்-களை தெரிவு செய்யுங்கள்.

Partition > Primary
File System > EXT2, EXT3 or EXT4 Partition.

குறிப்பு
File System என்பதில் நான் மேலே குறிப்பிட்டுள்ள எதாவது ஒரு டைப்-ஐ தெரிவு செய்யுங்கள்.

இப்போது Done என்பதை கிளிக் செய்து அடுத்த Partition-ஐ உருவாக்குங்கள்.

இப்போது Link2SD எனும் செயலியை உங்கள் ஸ்மார்ட் போனில் நிறுவுங்கள்.


நிறுவிய செயலியை திறவுங்கள். இப்போது இந்த செயலி ஆனது Root Permission என்று கேட்கும். அதற்க்கான அனுமதியை வழங்குங்கள்.

இப்போது Link2SD செயலியின் உதவியுடன் நீங்கள் கணணி மூலம் உங்களது SD Card-இல் உருவாக்கிய “.ext” Partition-ஐ (அதாவது RAM-க்கான Partition) உங்களது ஸ்மார்ட் போனின் மெமரி உடன் இணையுங்கள்.

இதுவரை நீங்கள் உங்களது ஸ்மார்ட் போனில் உபயோகிக்கும் SD Card-ஐ RAM-க்கு தேவையான அளவு Memory அளவு உடன் Partition செய்து அதை உங்களது ஸ்மார்ட் போனின் Internal மெமரி உடன் இணைத்து விட்டீர்கள்.

அடுத்ததாக உங்களது ஸ்மார்ட் போனில் புதிதாக சேர்க்கப்பட்ட Internal மெமரி-யை எப்படி RAM மெமரி உடன் இணைப்பது என்று பார்ப்போம்.

இதற்கு Swapper For Root எனும் செயலியை உங்கள் ஸ்மார்ட் போனில் நிறுவிக்கொள்ளுங்கள்.


இப்போது இந்த செயலியை திறந்து அங்கே Swap on Boot என்பதை தெரிவு செய்யுங்கள்.

அடுத்து Swap File Position என்பதில் Swap File Dimention என்ற ஐ தெரிவு செய்து உருவாக்க வேண்டிய RAM மெமரி-யின் அளவை வழங்குங்கள்.


நீங்கள் வழங்கும் RAM மெமரி-யின் அளவு நீங்கள் கணணி மூலம் உருவாக்கிய Partition-இன் மெமரி அளவை விட குறைவாக இருக்க வேண்டும்.

இறுதியாக Save என்பதை கிளிக் செய்யுங்கள்.

அவ்வளவு தான். இப்போது உங்கள் ஸ்மார்ட் போனை ஒரு முறை Restart செய்து விட்டு செட்டிங்க்ஸ் சென்று பாருங்கள். அங்கே உங்களது ஸ்மார்ட் போனின் RAM அதிகரிக்கப்பட்டிருப்பதை காணலாம்.

குறிப்பு

இந்த முறையில் உங்களது ஸ்மார்ட் போனின் RAM-ஐ அதிகரிப்பதானது மிகவும் Advance ஆன ஒன்றாகும். உங்களுக்கு இது பற்றிய முழுமையான தெளிவு இல்லையென்றால் இதை முயற்சிக்காமல் இருப்பதே சிறந்தது.

இந்த பதிவை நான் எழுதியது, Android போன் செட்டிங்க்ஸ்-ஐ ஹேக் செய்து இப்படியும் RAM-ஐ அதிகரித்துக்கொள்ளலாம் என்பதை உங்களுக்கு தெரியப்படுத்துவதற்காகவே ஆகும். இதை உங்களது சொந்த முயற்சியில் செய்து பாருங்கள்.

செயல்முறைகளின் போது உங்களது ஸ்மார்ட் போனிற்கோ அல்லது SD Card- ற்கோ ஏதாவது பாதிப்பு வந்தால் இந்த பதிவு பொறுப்பாகாது.

இந்த பதிவு முழுக்க முழுக்க Android சார்ந்த கல்வி அறிவிற்காகவே எழுதப்பட்டுள்ளது.

How to Run Multiple WhatsApp Account on Your Android Phone (Two WhatsApp in One Phone)


how to run multiple whatsapp accounts
WhatsApp is one of the most popular and commonly used Instant messaging apps these days and due to its simplicity and Easy to Use interface, users are able to use it without any hassle.
By now, everyone of us has WhatsApp in our smartphones. Although each and everything is quite handy in WhatsApp, "What's the most disturbing part that you came across?" 
For me it is:
How to use two WhatsApp account in one single mobile phone?

If you run dual SIM in your mobile phones, you might be willing to enjoy two separate WhatsApp account for your two different telephone numbers. Isn't it?

However, this is where WhatsApp puts limitations on its users. WhatsApp users can not use more than one WhatsApp account on their mobile devices.
You are probably wondering:
"How do I find an excellent solution to this problem that actually works?"
Today, I am introducing you not one but multiple solutions to your problem that will allow you to run two WhatsApp accounts in one phone.

METHOD 1: Use Multi-User in Android Lollipop Phones

If you want to run 2 WhatsApp Accounts on One Android Phone, you can use the Multi-User Feature offered by the Android Lollipop Operating System, including Cyanogen OS and other custom ROMs. 
Follow these simple steps to begin:
Step 1: Add Multi-User in Android Lollipop-Based smartphone. For this, just go to Settings and click on Users and then Add User.
Step 2: Once after creating a new user, provide complete details to setup a new user account
Step 3: Switch to the New User by pulling down the notification bar and clicking on New User icon.
Step 4: Once turned to New User, you will be provided with an all new phone interface with default phone settings.
Step 5: Now, Install WhatsApp in the New User Mode.
Step 6: Once WhatsApp is downloaded, enter all the details, and that is it.

Congratulations! You have successfully installed 2 WhatsApp accounts in One Single Phone without rooting or installing any other Custom ROM.
With the multi-user feature, you can even Enjoy multiple WhatsApp accounts on your single Android device.

METHOD 2: USE SWITCHME TO RUN MULTIPLE ACCOUNTS


SwitchMe-multiple-accounts
SwitchMe is an Android app that allows you to have two separate WhatsApp accounts on a single Android device, but this app requires your Android smartphone be rooted.
Now, Here's the deal:
Switchme multiple account app allows you to log in and out of multiple user spaces however it needs root access to do this. However, users cannot access the other profile from their current profile because each account within the multiple profiles will have its settings, applications, and data.
Follow these simple steps to go:
Step 1: Root your Android device.
Step 2: Make sure that you have WhatsApp app installed on your smartphone.
Step 3: Install SwitchMe Multiple accounts on your smartphone.
Step 4: Run SwitchMe Multiple accounts, it will ask for Superuser request that you need to grant.
Step 5: Now create a user profile with your name in SwitchMe app. This profile will be an administrator account containing all the current apps and settings, and will also reflect your WhatsApp profile that is already installed on your smartphone.
Step 6: Now create another profile using a different name by tapping on the Create Profile button in SwitchMe app, and then choose the Switch option by selecting this account.
Step 7: Now your smartphone will restart automatically and once it is ready to use, install official WhatsApp again from Google Play Store and register it for the different phone number. That is it.
Congratulations!
Unlike multi-user feature in Android Lollipop, the Free version of SwitchMe allows you to enjoy only 2 WhatsApp accounts on one single phone. However, SwitchMe's paid account allows you to run multiple WhatsApp accounts.

METHOD 3: USING OGWhatsApp


OGWhatsApp is an Android app that allows you to use two separate WhatsApp accounts on your single Android device without any need to root your Android device.
While running your normal WhatsApp account on your smartphone, you can follow some simple steps (below) in order to run a different WhatsApp account on the OGWhatsApp.
Follow these simple steps to go:
Step 1: Take a complete backup of your WhatsApp data and restore it.
Step 2: Delete all the WhatsApp data by going to Settings>apps>WhatsApp>Clear Data.
Step 3: Rename the /sdcard/WhatsApp directory to /sdcard/OGWhatsApp. You can use any file manager for Android to do this task, or from Windows.
Step 4: Uninstall your original WhatsApp app from your Android device.
Step 5: Now install OGWhatsApp in your Android smartphone.
Step 6: Once installed, remember to verify your old number that was previously registered with the original WhatsApp to OGWhatsApp. That is it.
Step 7: Now re-install the official WhatsApp for your other number from the play store.
Note: OGWhatsApp application for multiple WhatsApp account is not available now. So you can Choose any of the remaining two methods to run 2 WhatsApp in one mobile phone.
I have made available solutions for both users who want to use multiple WhatsApp accounts on their smartphone without rooting their Android device and with rooting their Android device respectively.
Go and enjoy WhatsApping!

எதுவித Software-ம் இன்றி Internet வேகத்தை கிட்டத்தட்ட 30%-ற்கும் மேல் அதிகரிப்பது எப்படி?

இணையம் உபயோகிக்கும் அனைவருக்கே உள்ள பொதுவான பிரச்சினை, இணைய வேகம். சில இடங்களில் நீங்கள், உங்கள் இணைய வழங்குனரிடம் இருந்து சிறப்பான வேகத்தை பெற்று கொள்ள முடியுமாக இருந்தாலும், பல இடங்களில் டவர் சரியாக கிடைக்காத காரணத்தால் இன்டர்நெட் வேகம் மிக மந்தமாகவே உள்ளது.

இப்படியான சந்தர்ப்பங்களில் உங்கள் கணனியில் சில மாற்றங்களை செய்வதன் மூலம் இன்டர்நெட் வேகத்தை அதிகரித்து கொள்ள முடியும்.

உங்கள் கணனியில் Start Menu-இற்கு சென்று அங்கே Run என்று Type செய்து Enter-ஐ அழுத்தவும்.

தோன்றும் window-வில் gpedit.msc என்று Type செய்து Enter-ஐ அழுத்தவும்.


அடுத்து தோன்றும் Window-வில் கீழ் குறிப்பிட்டுள்ள Path-ஐ சென்றடையவும்.

Computer configuration > Administrative templates >  network > QoS Packet Scheduler

அங்கே வலது பக்கத்தில் காணப்படும் Limit Reservable Bandwidth எனும் Option-ஐ Double Click செய்யவும்.


அடுத்து திறக்கப்படும் Window-வில் Enable எனும் Option-ஐ Click செய்து Bandwidth Limit-ஐ 0 என்று வைத்து OK Button-ஐ Click செய்யுங்கள்.


அவ்வளவு தான். இப்போது நீங்கள் இணையத்தை உபயோகிக்கும் போது கண்டிப்பாக இணைய வேகத்தில் மாற்றத்தை உணர்வீர்கள். இந்த சிறிய Settings மாற்றமானது உங்கள் கணனியில் இருக்கும் இணைய வேக கட்டுபாட்டை மாற்றி, இன்டர்நெட் வேகத்தை அதிகரிக்க உதவுகிறது.

 
google-site-verification: google18fa7bfb27754a8a.html google-site-verification: google089e704d9968b9b7.html