Dreamweaver CS3 Free Download

Dreamweaver CS3 Overview

Dreamweaver is a widely accepted application for developing web sites with minimum effort and in less time. While using Dreamweaver CS3 you don’t need any advanced coding knowledge.
Dreamweaver CS3 Free Download
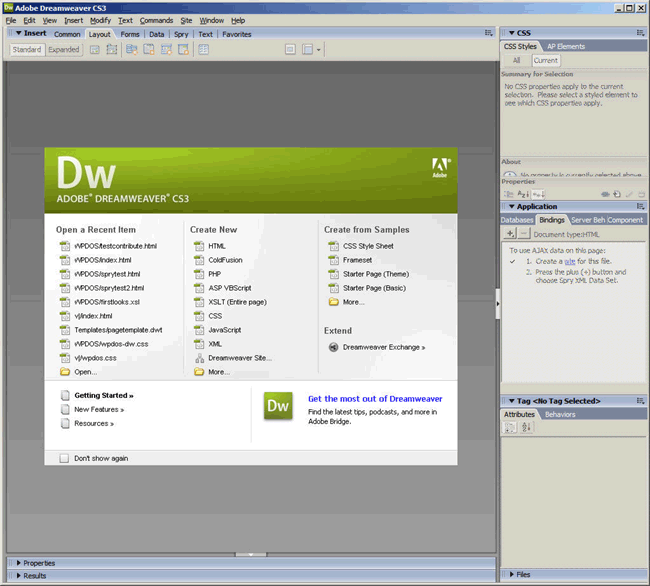
Dreamweaver CS3 is the product of Adobe. Macromedia was the software company that developed Dreamweaver. After Adobe bought Macromedia they integrated Dreamweaver with Adobe Photoshop and the result is Dreamweaver CS3 which is an impressive website editor.
Dreamweaver CS3 Download Free
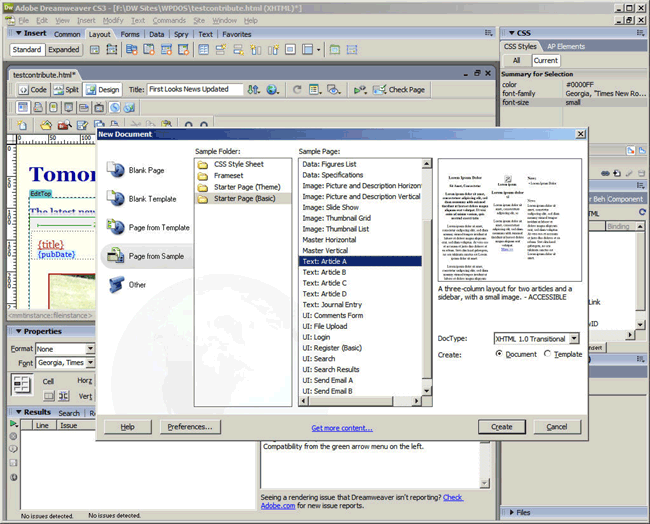
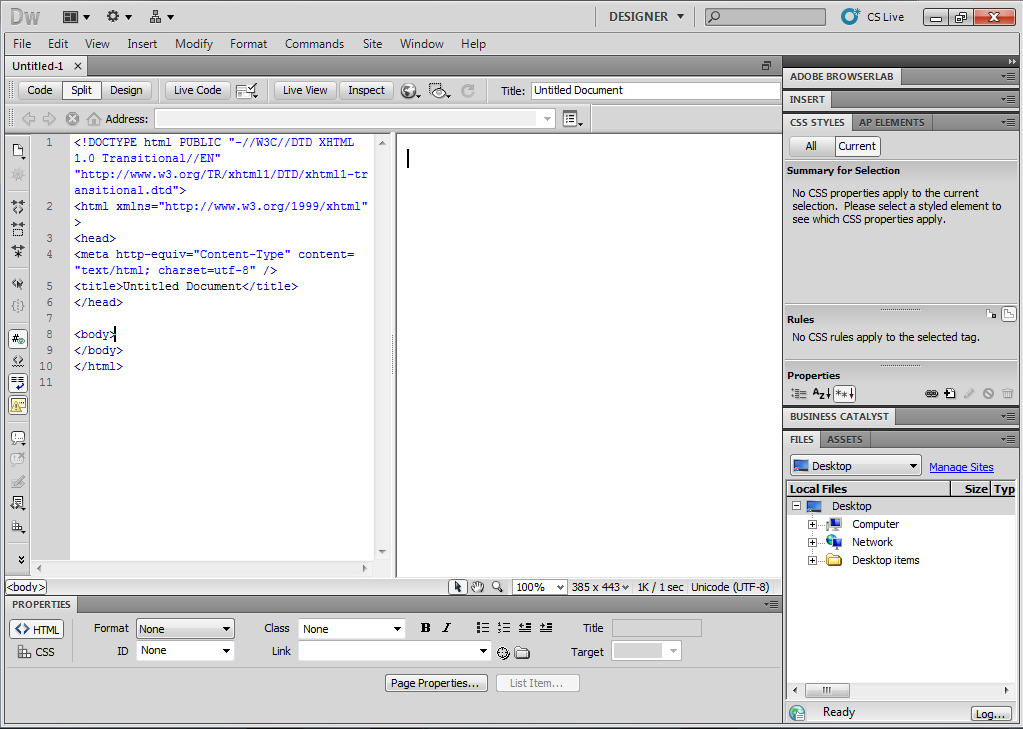
If you have no idea about how to initiate the website design or you need to learn how Dreamweaver CS3 works, the tool provides you starter page from samples. The document type can be left to its default type that is XHTML 1.0 Transitional. The document type can be changed as well from default by selecting the desired type from the drop down menu rested in the sample page preview image. A Create button is provided which upon hitting will start creating the sample page or you can double click the highlighted template or sample. After creating the page if you want to publish it on the internet it must be saved as index.html
Dreamweaver CS3 Free Download Setup
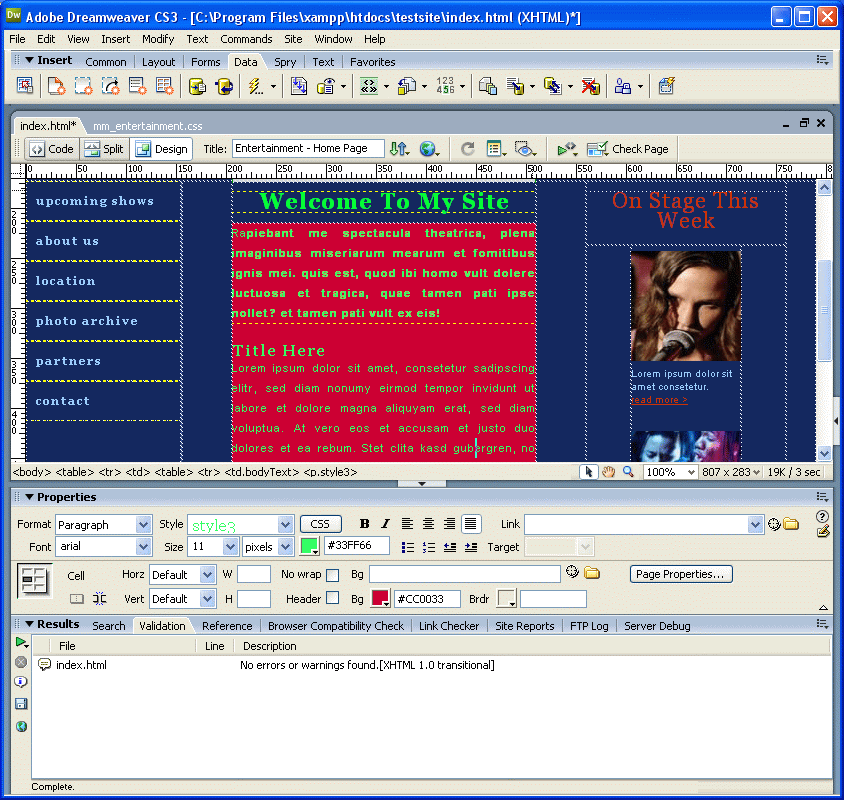
In Dreamweaver CS 3 you can change the color of the text and also can alter the body background color. Size of the text can also be changed.
Dreamweaver CS3 Full Setup
On a conclusive note we can say that Dreamweaver CS 3 is a great tool which is helpful in creating website and web related contents in a very professional way within no time.
Dreamweaver CS3 web design

Features Of Dreamweaver CS3

Listed below are some of the features which you will experience after Dreamweaver CS3 Free Download.
  • Easy to use.
  • No need of advanced coding knowledge.
  • Saves time.
  • Makes web pages in a professional way.
adobe Dreamweaver CS3 Free Download

Dreamweaver CS3 System Requirements

Before you start Dreamweaver CS3 free download, make sure your system meets the minimum system requirements.
  • Operating System: Windows XP, Vista, 7 and 8
  • Processor: Intel Pentium IV
  • RAM: 512MB
  • Hard Disk Space: 1GB space required
Dreamweaver CS3 software download

Technical Setup Details For Dreamweaver CS3

  • Software Name: Adobe Dreamweaver CS3
  • File name: Adobe_Dreamweaver_CS3.exe
  • Setup Full Size: 55 MB
  • Latest Release Version Added On: 11th Feb 2014
  • Developers: Adobe Dreamweaver
DW CS3 logo

Dreamweaver CS3 Free Download

Click on below button to start Dreamweaver CS3 Free download. This is complete offline installer and full standalone setup for Dreamweaver CS3. This will work for both 32 Bit and 64 Bit operating systems.

Dreamweaver CS5 Free Download

Dreamweaver CS5 Overview

Dreamweaver CS5 an application from adobe is used for creating and designing websites. Dreamweaver was was originally developed by Macromedia till Adobe systems acquired Macromedia in the year 2005. Adobe system has enhanced Dreamweaver to a level that it has become an essential for designing web now.
Dreamweaver CS5 Logo
Dremweaver has come in many versions and the version under review today is Dreamweaver CS5. The changes made in Dreamweaver CS5 has excited the web developers as it has made designing websites more simpler. In previous versions you need to write some boring code bits and the WYSIWYG editor was slow and cumbersome but with Dreamweaver CS5 they made it more simple now you remain in the visual mode more the maximum time for designing web contents.
Dreamweaver CS5 Free Download
One thing related to Dreamweaver is that it is a powerful editor with so many options that sometimes novices get confused which option to used and which not. The stakeholders at Adobe system have realized this problem encountered by novices and in this version they have fix many things. They have also added new features by which a new person to web development will learn HTML,web development and Dreamweaver more rapidly. In previous versions setting up a site was not that easy as you needed to know all about server, languages and all the other things just to set it up. But in this DW CS5 version all this information is prompted by the tool only when they need it thus making it simpler to setup your website. Now site setup has become as easy as giving a name to your site or the directory on your hard drive.
Dreamweaver CS5 Download Free
Improvements have been made in the starter layout of the tool and now there is more documentation being done so that a novice can learn more quickly that how he/she can use Dreamweaver.
The tool has come up with an inspect mode with which you can inspect the changes being made in CSS and its effects on the box odel in various browsers.
Dreamweaver CS5 Free Download setup
Dreamweaver CS5 has also great emphasis on helping programmers. Programmers can now enjoy new features being provided by this tool. Like code hinting has no longer limited to languages that you have in library. DW CS5 now can check you PHP code and will give you hints. A Dynamic File Finder has been  added that makes it more easy for programmers to work with templates.
Dreamweaver CS5 Download Full
On a conclusive note we can say that Dreamweaver CS5 is a web editor with many enhancements that will surely make you feel relaxed while designing sites.

Features Of Dreamweaver CS5

Listed below are some of the features which you will experience after Dreamweaver CS5 free download.
  • Easy to use.
  • Ideal for novices.
  • Web designing made more simpler.
  • Setup of website made simple.
  • Enhancements in starter layout.
  • Inspect mode.
  • New templates added.
  • Helpful for programmers.
Download Dreamweaver CS5 Free Full

Dreamweaver CS5 System Requirements

Before you start Dreamweaver CS5 free download, make sure your system meets the minimum system requirements.
  • Operating System: Windows XP, Vista, 7 and 8
  • Processor: Intel Pentium IV
  • RAM: 512MB
  • Hard Disk Space: 1GB space required
  • 1280×800 display with 16bit graphics adapter.
  • DVD ROM Drive.
  • Broadband Internet connection.

Technical Setup Details For Dreamweaver CS5

  • Software Name: Adobe Dreamweaver CS5
  • File name: Dreamweaver_CS5.exe
  • Setup Full Size: 118 MB
  • Latest Version Release Added On: 11th Feb 2014
  • Developers: Adobe Dreamweaver

Dreamweaver CS5 Free Download

Click on below button to start Dreamweaver CS5 free download. This is complete offline installer and full standalone setup for Dreamweaver CS5. This will work for both 32 Bit and 64 Bit operating systems.

Dreamweaver CS6 Free Download

Dreamweaver CS6 Overview

Dreamweaver CS6 is a WSIWYG editor which is useful for designing your web pages. Dreamweaver CS6 has been developed by Adobe systems. It is the leader in the category of web editors for a long time now. It has many features which can help a person who has just dived into the ocean of web development.

Dreamweaver CS6 has many new features that will left a soothing effect on all web developers. The application has come up with a new fluid grid layout tool. Fluid Grid Layout is a famous and world acclaimed way of designing websites. Dreamweaver already used grid layout but in this version they introduced Fluid Grid Layout which uses percentages for specifying heights and width.
Dreamweaver CS6 Download Free
Then there is another striking new feature i.e. CSS3 Transitions with this new feature you are able to create animated transitions for your design. I am not saying that creating animated transitions were not possible in older versions but it was not as simple as in this version. DW CS6 lets you visually create the transition which you want in your design with CSS3 Transition Panel. All you need to do is to select the element you need to be in transition and then add it to the panel rest is up to Dreamweaver.
Dreamweaver CS6 Download

The integration with Phone Gap has been updated and now its more easier to create mobile applications in Dreamweaver and after creating you can easily export it to iOS or Android directly from Dreamweaver CS6. Now  you can connect your Dreamweaver websites with Adobe  Business Catalyst. With Business Catalyst you can easily add shopping carts and other e commerce features into your websites.
Download Dreamweaver CS6 Free
On a conclusive note we can say that Dreamweaver CS6 is a great tool the has made web designing an easy job to perform.

Features Of Dreamweaver CS6:

Listed below are some of the features which you will experience after Dreamweaver CS6 free download.
  • Easy to use.
  • Web development made easy.
  • Fluid grid layout.
  • CSS3 Transitions Panel.
  • Integration with phone gap.
  • Connection Adobe Business Catalyst
Download Dreamweaver CS6 Full Setup


Dreamweaver CS6 System Requirements:

Before you start Dreamweaver CS6 free download, make sure your system meets the minimum system requirements.
  • Operating System: Windows XP, Vista, 7 and 8
  • Processor: Intel Pentium IV
  • RAM: 512MB
  • Hard Disk Space: 1GB space required
  • 1200×800 display with 16bit graphics adapter.
  • Java Runtime Environment 1.6
Adobe Dreamweaver CS6 setup download

Technical Setup Details For Dreamweaver CS6

  • Software Name: Adobe Dreamweaver CS6 12.0.1 Build 5842 MultiLingual
  • File name: Dreamweaver_12_LS6.exe
  • Setup Full Size: 283 MB
  • Latest version Release Added On: 10th Feb 2014
  • Developers: Adobe Dreamweaver
Dreamweaver CS6 jquery mobile

Dreamweaver CS6 Free Download

Click on below button to start Dreamweaver CS6 download. This is complete offline installer and full standalone setup for Dreamweaver CS6 This will work for both 32 Bit and 64 Bit operating systems.


Merging Data from Multiple Workbooks into a Summary Workbook in Excel

Merging Data from Multiple Workbooks into a Summary Workbook in Excel

Office 2007
Summary: Microsoft Office Excel MVP Ron de Bruin provides a number of samples and a handy add-in to merge data from multiple workbooks located in one folder into a summary workbook. (13 printed pages)

When working with multiple Microsoft Office Excel workbooks, a common task is to roll-up or merge the data in each workbook into a master workbook. The examples described in this article add the data from multiple workbooks to a summary workbook. The different procedures demonstrate techniques for pasting the data by row or by column. Additionally, you will see how to retrieve data by using a filter. And finally, you will see a utility that pulls all of these techniques together and more in one location.
You can download workbooks containing the code in this article at Ron de Bruin's Web site.

The following code is used in some of the examples in this article.

To find the last cell, column, or row in a range

  1. Open a new workbook in Excel.
  2. Press Alt+F11 to open the Visual Basic Editor.
  3. On the Insert menu, click Module to add a module to the workbook.
  4. In the module window, type or paste the following function and then press Alt+Q to close the Visual Basic Editor.
Function RDB_Last(choice As Integer, rng As Range)
' By Ron de Bruin, 5 May 2008
' A choice of 1 = last row.
' A choice of 2 = last column.
' A choice of 3 = last cell.
   Dim lrw As Long
   Dim lcol As Integer

   Select Case choice

   Case 1:
      On Error Resume Next
      RDB_Last = rng.Find(What:="*", _
                          after:=rng.cells(1), _
                          Lookat:=xlPart, _
                          LookIn:=xlFormulas, _
                          SearchOrder:=xlByRows, _
                          SearchDirection:=xlPrevious, _
                          MatchCase:=False).Row
      On Error GoTo 0

   Case 2:
      On Error Resume Next
      RDB_Last = rng.Find(What:="*", _
                          after:=rng.cells(1), _
                          Lookat:=xlPart, _
                          LookIn:=xlFormulas, _
                          SearchOrder:=xlByColumns, _
                          SearchDirection:=xlPrevious, _
                          MatchCase:=False).Column
      On Error GoTo 0

   Case 3:
      On Error Resume Next
      lrw = rng.Find(What:="*", _
                    after:=rng.cells(1), _
                    Lookat:=xlPart, _
                    LookIn:=xlFormulas, _
                    SearchOrder:=xlByRows, _
                    SearchDirection:=xlPrevious, _
                    MatchCase:=False).Row
      On Error GoTo 0

      On Error Resume Next
      lcol = rng.Find(What:="*", _
                     after:=rng.cells(1), _
                     Lookat:=xlPart, _
                     LookIn:=xlFormulas, _
                     SearchOrder:=xlByColumns, _
                     SearchDirection:=xlPrevious, _
                     MatchCase:=False).Column
      On Error GoTo 0

      On Error Resume Next
      RDB_Last = rng.Parent.cells(lrw, lcol).Address(False, False)
      If Err.Number > 0 Then
         RDB_Last = rng.cells(1).Address(False, False)
         Err.Clear
      End If
      On Error GoTo 0

   End Select
End Function

This function uses the Range object's Find method to search for the last item in the workbook depending on the value of the choice argument. The choice argument specifies a cell, column, or row.

To merge data from all workbooks in a folder, type or paste the following code in standard module in the Visual Basic Editor. The ranges are concatenated into the target worksheet, one after another, in rows.
Sub MergeAllWorkbooks()
    Dim MyPath As String, FilesInPath As String
    Dim MyFiles() As String
    Dim SourceRcount As Long, FNum As Long
    Dim mybook As Workbook, BaseWks As Worksheet
    Dim sourceRange As Range, destrange As Range
    Dim rnum As Long, CalcMode As Long

    ' Change this to the path\folder location of your files.
    MyPath = "C:\Users\Ron\test"

    ' Add a slash at the end of the path if needed.
    If Right(MyPath, 1) <> "\" Then
        MyPath = MyPath & "\"
    End If

    ' If there are no Excel files in the folder, exit.
    FilesInPath = Dir(MyPath & "*.xl*")
    If FilesInPath = "" Then
        MsgBox "No files found"
        Exit Sub
    End If

    ' Fill the myFiles array with the list of Excel files
    ' in the search folder.
    FNum = 0
    Do While FilesInPath <> ""
        FNum = FNum + 1
        ReDim Preserve MyFiles(1 To FNum)
        MyFiles(FNum) = FilesInPath
        FilesInPath = Dir()
    Loop

    ' Set various application properties.
    With Application
        CalcMode = .Calculation
        .Calculation = xlCalculationManual
        .ScreenUpdating = False
        .EnableEvents = False
    End With

    ' Add a new workbook with one sheet.
    Set BaseWks = Workbooks.Add(xlWBATWorksheet).Worksheets(1)
    rnum = 1

    ' Loop through all files in the myFiles array.
    If FNum > 0 Then
        For FNum = LBound(MyFiles) To UBound(MyFiles)
            Set mybook = Nothing
            On Error Resume Next
            Set mybook = Workbooks.Open(MyPath & MyFiles(FNum))
            On Error GoTo 0

            If Not mybook Is Nothing Then
                On Error Resume Next

                ' Change this range to fit your own needs.
                With mybook.Worksheets(1)
                    Set sourceRange = .Range("A1:C1")
                End With

                If Err.Number > 0 Then
                    Err.Clear
                    Set sourceRange = Nothing
                Else
                    ' If source range uses all columns then 
                    ' skip this file.
                    If sourceRange.Columns.Count >= BaseWks.Columns.Count Then
                        Set sourceRange = Nothing
                    End If
                End If
                On Error GoTo 0

                If Not sourceRange Is Nothing Then

                    SourceRcount = sourceRange.Rows.Count

                    If rnum + SourceRcount >= BaseWks.Rows.Count Then
                        MsgBox "There are not enough rows in the target worksheet."
                        BaseWks.Columns.AutoFit
                        mybook.Close savechanges:=False
                        GoTo ExitTheSub
                    Else

                        ' Copy the file name in column A.
                        With sourceRange
                            BaseWks.Cells(rnum, "A"). _
                                    Resize(.Rows.Count).Value = MyFiles(FNum)
                        End With

                        ' Set the destination range.
                        Set destrange = BaseWks.Range("B" & rnum)

                        ' Copy the values from the source range
                        ' to the destination range.
                        With sourceRange
                            Set destrange = destrange. _
                                            Resize(.Rows.Count, .Columns.Count)
                        End With
                        destrange.Value = sourceRange.Value

                        rnum = rnum + SourceRcount
                    End If
                End If
                mybook.Close savechanges:=False
            End If

        Next FNum
        BaseWks.Columns.AutoFit
    End If

ExitTheSub:
    ' Restore the application properties.
    With Application
        .ScreenUpdating = True
        .EnableEvents = True
        .Calculation = CalcMode
    End With
End Sub

This procedure fills an array with the path and name of each workbook in a folder. It then loops through the array and for each source file, checks the source and target ranges to see if there are more columns used in the source range than are available in the target range. If this is true, then this workbook is skipped and the code moves to the next workbook. The code then does the same test for the rows in the source range.
Next the procedure copies the path and name of the source workbook into column A. Finally, the values in the source range are copied into the corresponding range in the target workbook and the code moves to the next file in the array.
This procedure uses the first worksheet (index 1) of each workbook. To start with a different worksheet to use a specific worksheet, just change the index number or change the index to the name of the worksheet.
With mybook.Worksheets("YourSheetName")

You will also likely want to change the range A1:C1 to your own values.
With mybook.Worksheets(1)
    Set sourceRange = .Range("A1:C1")
End With

If you want to copy from cell A2 until the last cell on the worksheet then replace this code with the following code. You might do this if there are headers in the first row.
NoteNote
If you use this procedure, copy the function RDB_Last into your code module.
First, add this line at the top of the macro.
Dim FirstCell As String

Then add this code.
With mybook.Worksheets(1)
   FirstCell = "A2"
   Set sourceRange = .Range(FirstCell & ":" & RDB_Last(3, .Cells))
   ' Test if the row of the last cell is equal to or greater than the row of the first cell.
   If RDB_Last(1, .Cells) < .Range(FirstCell).Row Then
      Set sourceRange = Nothing
   End If
End With

To merge data from specific workbooks, type or paste the following code in the module code window.
Private Declare Function SetCurrentDirectoryA Lib _
    "kernel32" (ByVal lpPathName As String) As Long

Sub ChDirNet(szPath As String)
    SetCurrentDirectoryA szPath
End Sub


Sub MergeSpecificWorkbooks()
    Dim MyPath As String
    Dim SourceRcount As Long, FNum As Long
    Dim mybook As Workbook, BaseWks As Worksheet
    Dim sourceRange As Range, destrange As Range
    Dim rnum As Long, CalcMode As Long
    Dim SaveDriveDir As String
    Dim FName As Variant


    ' Set application properties.
    With Application
        CalcMode = .Calculation
        .Calculation = xlCalculationManual
        .ScreenUpdating = False
        .EnableEvents = False
    End With

    SaveDriveDir = CurDir
    ' Change this to the path\folder location of the files.
    ChDirNet "C:\Users\Ron\test"

    FName = Application.GetOpenFilename(filefilter:="Excel Files (*.xl*), *.xl*", _
                                        MultiSelect:=True)
    If IsArray(FName) Then

        ' Add a new workbook with one sheet.
        Set BaseWks = Workbooks.Add(xlWBATWorksheet).Worksheets(1)
        rnum = 1


        ' Loop through all files in the myFiles array.
        For FNum = LBound(FName) To UBound(FName)
            Set mybook = Nothing
            On Error Resume Next
            Set mybook = Workbooks.Open(FName(FNum))
            On Error GoTo 0

            If Not mybook Is Nothing Then

                On Error Resume Next
                With mybook.Worksheets(1)
                    Set sourceRange = .Range("A1:C1")
                End With

                If Err.Number > 0 Then
                    Err.Clear
                    Set sourceRange = Nothing
                Else
                    ' If the source range uses all columns then
                    ' skip this file.
                    If sourceRange.Columns.Count >= BaseWks.Columns.Count Then
                        Set sourceRange = Nothing
                    End If
                End If
                On Error GoTo 0

                If Not sourceRange Is Nothing Then

                    SourceRcount = sourceRange.Rows.Count

                    If rnum + SourceRcount >= BaseWks.Rows.Count Then
                        MsgBox "There are not enough rows in the target worksheet."
                        BaseWks.Columns.AutoFit
                        mybook.Close savechanges:=False
                        GoTo ExitTheSub
                    Else

                        ' Copy the file name in column A.
                        With sourceRange
                            BaseWks.Cells(rnum, "A"). _
                                    Resize(.Rows.Count).Value = FName(FNum)
                        End With

                        ' Set the destination range.
                        Set destrange = BaseWks.Range("B" & rnum)

                        ' Copy the values from the source range
                        ' to the destination range.
                        With sourceRange
                            Set destrange = destrange. _
                                            Resize(.Rows.Count, .Columns.Count)
                        End With
                        destrange.Value = sourceRange.Value
                        rnum = rnum + SourceRcount
                    End If
                End If
                mybook.Close savechanges:=False
            End If

        Next FNum
        BaseWks.Columns.AutoFit
    End If

ExitTheSub:
    ' Restore the application properties.
    With Application
        .ScreenUpdating = True
        .EnableEvents = True
        .Calculation = CalcMode
    End With
    ChDirNet SaveDriveDir
End Sub
This code example will do the same thing as the first example only you are able to select the files you want to merge. The function ChDirNet is used so that you can set the starting path to the network folder of your choice. You can also change the worksheet and range by using the changes described in the first example.

To paste data from source workbooks horizontally (in columns) in a target workbook, type or paste the following code in the module code window.
Sub MergeHorizontally()
    Dim MyPath As String, FilesInPath As String
    Dim MyFiles() As String
    Dim SourceCcount As Long, FNum As Long
    Dim mybook As Workbook, BaseWks As Worksheet
    Dim sourceRange As Range, destrange As Range
    Dim Cnum As Long, CalcMode As Long

    ' Change this to the path\folder location of the files.
    MyPath = "C:\Users\Ron\test"

    ' Add a slash at the end of path if needed.
    If Right(MyPath, 1) <> "\" Then
        MyPath = MyPath & "\"
    End If

    ' If there are no Excel files in the folder, exit.
    FilesInPath = Dir(MyPath & "*.xl*")
    If FilesInPath = "" Then
        MsgBox "No files found"
        Exit Sub
    End If

    ' Fill in the myFiles array with the list of Excel files in 
    ' the search folder.
    FNum = 0
    Do While FilesInPath <> ""
        FNum = FNum + 1
        ReDim Preserve MyFiles(1 To FNum)
        MyFiles(FNum) = FilesInPath
        FilesInPath = Dir()
    Loop

    ' Change the application properties.
    With Application
        CalcMode = .Calculation
        .Calculation = xlCalculationManual
        .ScreenUpdating = False
        .EnableEvents = False
    End With

    ' Add a new workbook with one sheet.
    Set BaseWks = Workbooks.Add(xlWBATWorksheet).Worksheets(1)
    Cnum = 1

    ' Loop through all of the files in the myFiles array.
    If FNum > 0 Then
        For FNum = LBound(MyFiles) To UBound(MyFiles)
            Set mybook = Nothing
            On Error Resume Next
            Set mybook = Workbooks.Open(MyPath & MyFiles(FNum))
            On Error GoTo 0

            If Not mybook Is Nothing Then

                On Error Resume Next
                Set sourceRange = mybook.Worksheets(1).Range("A1:A10")

                If Err.Number > 0 Then
                    Err.Clear
                    Set sourceRange = Nothing
                Else
                    ' If the source range uses all of the rows 
                    ' then skip this file.
                    If sourceRange.Rows.Count >= BaseWks.Rows.Count Then
                        Set sourceRange = Nothing
                    End If
                End If
                On Error GoTo 0

                If Not sourceRange Is Nothing Then

                    SourceCcount = sourceRange.Columns.Count

                    If Cnum + SourceCcount >= BaseWks.Columns.Count Then
                        MsgBox "There are not enough columns in the sheet."
                        BaseWks.Columns.AutoFit
                        mybook.Close savechanges:=False
                        GoTo ExitTheSub
                    Else

                        ' Copy the file name in the first row.
                        With sourceRange
                            BaseWks.Cells(1, Cnum). _
                                    Resize(, .Columns.Count).Value = MyFiles(FNum)
                        End With

                        ' Set the destination range.
                        Set destrange = BaseWks.Cells(2, Cnum)

                        ' Copy the values from the source range 
                        ' to the destination range.
                        With sourceRange
                            Set destrange = destrange. _
                                            Resize(.Rows.Count, .Columns.Count)
                        End With
                        destrange.Value = sourceRange.Value

                        Cnum = Cnum + SourceCcount
                    End If
                End If
                mybook.Close savechanges:=False
            End If

        Next FNum
        BaseWks.Columns.AutoFit
    End If

ExitTheSub:
    'Restore ScreenUpdating, Calculation and EnableEvents
    With Application
        .ScreenUpdating = True
        .EnableEvents = True
        .Calculation = CalcMode
    End With

End Sub

The following line is where columns are specified as the target as opposed to rows.
Set destrange = BaseWks.Cells(2, Cnum)

To merge data retrieved based on a filter, type or paste the following code in the module code window.
Sub MergewithAutoFilter()
    Dim MyPath As String, FilesInPath As String
    Dim MyFiles() As String
    Dim SourceRcount As Long, FNum As Long
    Dim mybook As Workbook, BaseWks As Worksheet
    Dim sourceRange As Range, destrange As Range
    Dim rnum As Long, CalcMode As Long
    Dim rng As Range, SearchValue As String
    Dim FilterField As Integer, RangeAddress As String
    Dim ShName As Variant, RwCount As Long

    '**************************************************************
    '***Change these five lines of code before you run the macro***
    '**************************************************************

    ' Change this to the path\folder location of the files.
    MyPath = "C:\Users\Ron\test"

    ' Fill in the name of the sheet containing the data.
    ' Use ShName = "Sheet Name" to use a sheet name instead if its 
    ' index. This example uses the index of the first sheet in 
    ' every workbook.
    ShName = 1

    ' Fill in the filter range: A1 is the header of the first 
    ' column and G is the last column in the range and will
    ' filter on all rows on the sheet.
    ' You can also use a fixed range such as A1:G2500.
    RangeAddress = Range("A1:G" & Rows.Count).Address

    ' Set the field that you want to filter in the range 
    ' "1 = column A" in this example because the filter range 
    ' starts in column A.
    FilterField = 1

    ' Fill in the filter value. Use the "<>" if you want to 
    ' filter on the absence of a term. Or use wildcards such
    ' as "ron*" for cells that start with ron, or use
    ' "*ron*" if you look for cells where ron is a part of the
    ' cell value.
    SearchValue = "ron"

    '**********************************************************
    '**********************************************************


    ' Add a slash after MyPath if needed.
    If Right(MyPath, 1) <> "\" Then
        MyPath = MyPath & "\"
    End If

    ' If there are no Excel files in the folder, exit.
    FilesInPath = Dir(MyPath & "*.xl*")
    If FilesInPath = "" Then
        MsgBox "No files found"
        Exit Sub
    End If

    ' Fill the myFiles array with the list of Excel files in the
    ' folder.
    FNum = 0
    Do While FilesInPath <> ""
        FNum = FNum + 1
        ReDim Preserve MyFiles(1 To FNum)
        MyFiles(FNum) = FilesInPath
        FilesInPath = Dir()
    Loop

    ' Change application properties.
    With Application
        CalcMode = .Calculation
        .Calculation = xlCalculationManual
        .ScreenUpdating = False
        .EnableEvents = False
    End With

    ' Add a new workbook with one sheet.
    Set BaseWks = Workbooks.Add(xlWBATWorksheet).Worksheets(1)
    rnum = 1

    ' Loop through all files in the myFiles array.
    If FNum > 0 Then
        For FNum = LBound(MyFiles) To UBound(MyFiles)
            Set mybook = Nothing
            On Error Resume Next
            Set mybook = Workbooks.Open(MyPath & MyFiles(FNum))
            On Error GoTo 0

            If Not mybook Is Nothing Then

                On Error Resume Next
                ' Set the filter range.
                With mybook.Worksheets(ShName)
                    Set sourceRange = .Range(RangeAddress)
                End With

                If Err.Number > 0 Then
                    Err.Clear
                    Set sourceRange = Nothing
                End If
                On Error GoTo 0

                If Not sourceRange Is Nothing Then
                    ' Find the last row in target worksheet.
                    rnum = RDB_Last(1, BaseWks.Cells) + 1

                    With sourceRange.Parent
                        Set rng = Nothing

                        ' Remove the AutoFilter.
                        .AutoFilterMode = False

                        ' Filter the range on the 
                        ' value in filter column.
                        sourceRange.AutoFilter Field:=FilterField, _
                                               Criteria1:=SearchValue

                        With .AutoFilter.Range

                            ' Check to see if there are results
                            ' after after applying the filter.
                            RwCount = .Columns(1).Cells. _
                                      SpecialCells(xlCellTypeVisible).Cells.Count - 1

                            If RwCount = 0 Then
                                ' There is no data, only the 
                                ' header.
                            Else
                                ' Set a range without the 
                                ' header row.
                                Set rng = .Resize(.Rows.Count - 1, .Columns.Count). _
                                          Offset(1, 0).SpecialCells(xlCellTypeVisible)


                                ' Copy the range and the file name
                                ' in column A.
                                If rnum + RwCount < BaseWks.Rows.Count Then
                                    BaseWks.Cells(rnum, "A").Resize(RwCount).Value _
                                          = mybook.Name
                                    rng.Copy BaseWks.Cells(rnum, "B")
                                End If
                            End If

                        End With

                        'Remove the AutoFilter
                        .AutoFilterMode = False

                    End With
                End If

                ' Close the workbook without saving.
                mybook.Close savechanges:=False
            End If

            ' Open the next workbook.
        Next FNum

        ' Set the column width in the new workbook.
        BaseWks.Columns.AutoFit
        MsgBox "Look at the merge results in the new workbook " & _
           "after you click on OK."
    End If

    ' Restore the application properties.
    With Application
        .ScreenUpdating = True
        .EnableEvents = True
        .Calculation = CalcMode
    End With
End Sub

In this example, the following line of code is used to search for data matching the search term.
sourceRange.AutoFilter Field:=FilterField, Criteria1:=SearchValue

In the previous paragraphs, four code examples for working for files in one folder were discussed. Minor changes to these examples can make them even more useful. For example, if your workbooks are password protected, you can replace the Workbooks.Open arguments with the following code to open them.
Set mybook = Workbooks.Open(MyPath & MyFiles(Fnum), _
   Password:="ron", WriteResPassword:="ron", UpdateLinks:=0)

If you have links in your workbook to other workbooks, the setting UpdateLinks:=0 will avoid the message of whether you want to update the links. Use the value 3 if you do want to update the links.
Another change you can make is to merge from all files with a name that starts with a specific name. For example, you can use the following statement to find all workbooks that start with week.
FilesInPath = Dir(MyPath & "week*.xl*")
You can find more information and code sample for merging the data in the subfolders and looping through all worksheets in every workbook at the following location on Ron de Bruin's Web site.

The RDBMerge utility provides a user friendly way to merge data from workbooks in a folder into one worksheet in a new workbook. Working with the add-in is very easy; however, for more information, see the page on Ron de Bruin's Web site.

To install the RDBMerge utility

  1. Navigate to the RDBMerge utility page.
  2. Download and extract the zip file to a local directory on your computer.
  3. Copy either RDBMerge.xlam or RDBMerge.xla, depending on whether you are using the 2007 release of Microsoft Office or a previous version of Microsoft Office, respectively, to the following directory:
    local_drive:\Program Files\Microsoft Office\Version_Number\Library
    NoteNote
    Depending on the version of Excel you are using, the Version_Number directory may be named just Office or may include a version number. For example: local_drive:\Program Files\Microsoft Office\Office\Library or local_drive:\Program Files\Microsoft Office\Office11\Library.
    Once the utility is installed, do the following to access it:
  4. Start Excel and open a workbook.
  5. (Excel 2007 only) Click the Microsoft Office button, click Excel Options, and then click the Add-Ins tab. In the Manage drop-down list, click Excel Add-ins, and then click Go. Verify that RDBMerge is selected in this list and then click OK.
  6. (Excel 2000-2003 only) Click Tools, click Add-Ins, verify RDBMerge is selected in the list, and then click OK.

In this article, you explored several code samples that you can use to merge data from all workbooks in a folder into a master workbook. Additionally, the RDBMerge add-in can assist you to do this task very easy. Exploring and implementing these tools in your own applications can help make your job as a developer easier and make your solutions more versatile.

Ron de Bruin is an Excel Most Valuable Professional (MVP) and a frequent contributor to the newsgroups. For more information, see Ron's Excel Web page.
Frank Rice is a programming writer and frequent contributor to the Microsoft Office Developer Center.

 
google-site-verification: google18fa7bfb27754a8a.html google-site-verification: google089e704d9968b9b7.html