Having Windows 8.1 and then connecting to a wireless network,
sometimes it may create some problems. Well I use Ubuntu most of the
time, but I have a friend who use Windows and recently upgraded to
Windows 8.1. So the other day, we were doing some project and he needed
to connect to Internet. So, I created an Ad Hoc WiFi network on my
Ubuntu, but he was unable to locate the network on his PC. Then we came
to know about the problem, so we looked for the solution.
I thought for writing about it coz it may be a problem for a lot of people. So, here’s the solution which can help you:
Step 1:
First of all open your Command Prompt (Open Start menu and then search ‘cmd’).

Step 2:
Now to see all networks in range, including Ad Hoc, run this command in command shell:

Here the Ad-hoc network to which I am going to connect is ‘ssh’.
Step 3:
Now comes the setup part for setting the network. This must be done once per network.

Run the following command :
with the SSID of the network to which you are connecting (Here ‘ssh’).

Step 5:
After setting up the network, run this command whenever you want to connect:
with the SSID of the network to which you are connecting (Here “ssh”).

Hovering over WiFi icon in system tray will show the name of the network that you are currently connected to, even if it’s an Ad Hoc WiFi network (the network picker will not show it if it’s ad-hoc). The name is also visible in “Network and Sharing Center” window.
Now if you want to disconnect from the network, you can:

To remove the Ad-hoc network profile from Windows, run the following command:
with the SSID the network which you want to delete (here “ssh”)

Did you find this post helpful? Facing some problem in creating Ad Hoc WiFi network? Feel free to share with us in comments below.
I thought for writing about it coz it may be a problem for a lot of people. So, here’s the solution which can help you:
Step 1:
First of all open your Command Prompt (Open Start menu and then search ‘cmd’).

Step 2:
Now to see all networks in range, including Ad Hoc, run this command in command shell:
netsh wlan show networks
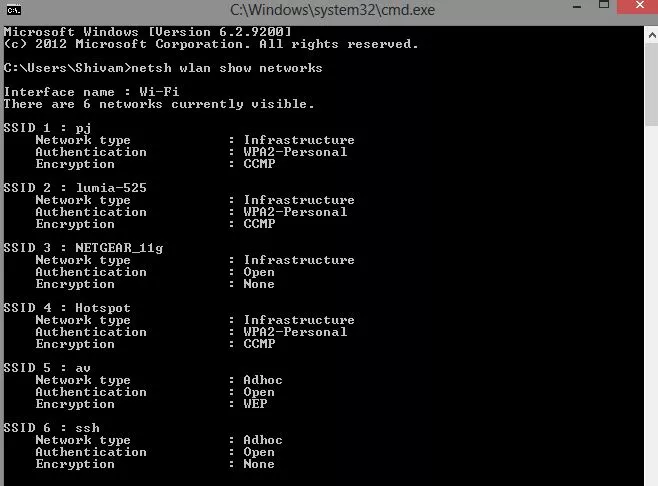
Here the Ad-hoc network to which I am going to connect is ‘ssh’.
Step 3:
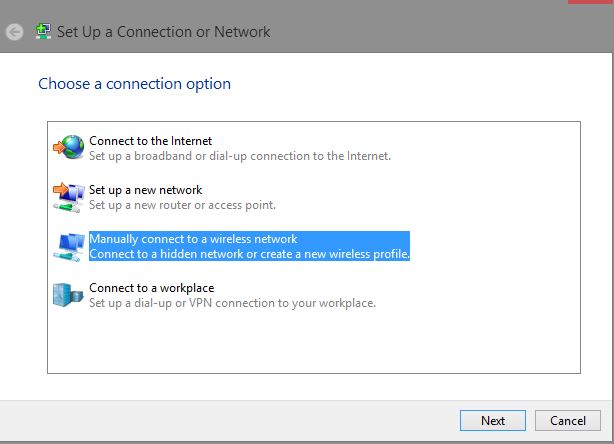
Now comes the setup part for setting the network. This must be done once per network.
- Enter the SSID of the Ad Hoc WiFi network (as shown by “netsh wlan show networks”) into the “Network name” field (here ‘ssh’).
- Configure security settings accordingly.
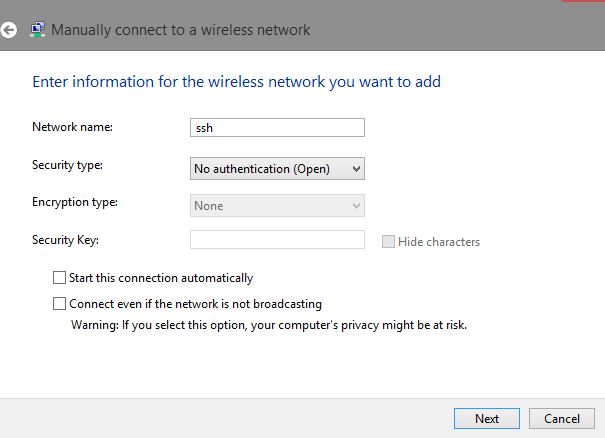
- Uncheck “Start this connection automatically” (important)
- Click “Next”, then “Close”
Run the following command :
netsh wlan set profileparameter connectiontype=ibss
Replace 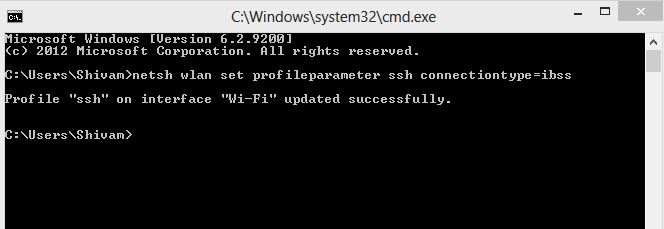
Step 5:
After setting up the network, run this command whenever you want to connect:
netsh wlan connect
Replace 
Hovering over WiFi icon in system tray will show the name of the network that you are currently connected to, even if it’s an Ad Hoc WiFi network (the network picker will not show it if it’s ad-hoc). The name is also visible in “Network and Sharing Center” window.
Now if you want to disconnect from the network, you can:
- Connect to a different network,
- Turn off WiFi, or
- Run the following command:
netsh wlan disconnect

To remove the Ad-hoc network profile from Windows, run the following command:
netsh wlan delete profile
Replace 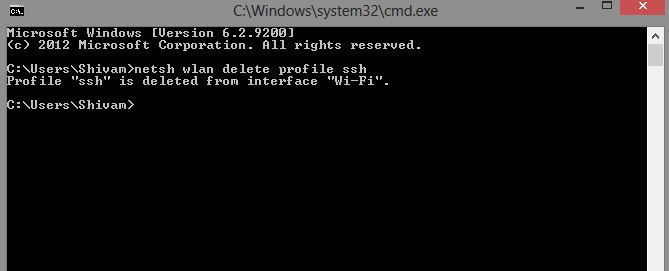
Did you find this post helpful? Facing some problem in creating Ad Hoc WiFi network? Feel free to share with us in comments below.


